This is a sponsored post. I have received compensation from CoSchedule in the form of a discount. The review and opinions are my own. (Seriously folks, I couldn't function without CoSchedule. If you are a blogger or other online business owner go check it out already)
How to use the Marketing Calendar from CoSchedule to schedule emails in Mailchimp and other email marketing programs.
When I open my web browser, it automatically opens to one of my favorite CoSchedule Calendar views so I can see at a glance what tasks I have coming up and then with one click I can get right to work.
I have written dozens of emails to my subscribers that have never actually been sent. The problem is, I think about doing it while I am finishing up a blog post and then get side tracked and never go over to Mailchimp to schedule them.
I am ashamed to admit it took me far to long to simply schedule my weekly email in CoSchedule so it shows up on my Calendar View to nag remind me and I can get started right from there.
What is CoSchedule?
For those not in the know, CoSchedule is an electronic marketing calendar that I use as a blog planner, social media scheduler and tasks organizer to help me stay focused on all of the moving parts involved in building my brand.
CoSchedule offers a free trial to put it through it's paces and see if it is the right fit for you. And that is a real free trial, not one of those "give your credit card and hope you remember to cancel before you are charged free" offers.
I pay annually which saves me some money, plus the link below is an affiliate link. If you follow it and decide you love CoSchedule as much as I do and subscribe, I save a few bucks on my annual fee.
NOTE: I have been using CoSchedule for a number of years and am grandfathered in to an old plan, which may offer different features with different plan names than are currently offered.
Use CoSchedule to Create Emails
CoSchedule integrates with several of the biggest email marketing programs out there: Mailchimp, Active Campaign, Campaign Monitor and Constant Contact.
I use Mailchimp, so that's what the images and tutorial show, but the others are similar enough you will probably get the idea of how to proceed.
Create an email template task in CoSchedule
Click Create over on the far right and select Mailchimp (or your email marketing company).
If you use a company other than one integrated with CoSchedule you want to choose Project then change Social Media Campaign to Email Marketing.
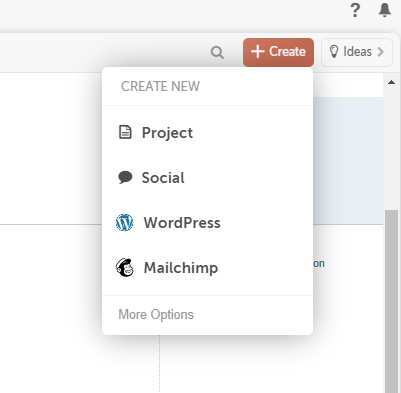
Create the project template
Give your project a generic name that is going to appear on your calendar. I have all of my tasks color coded to make organization easier, so I click on that little white circle next to my profile pic and chose the category.
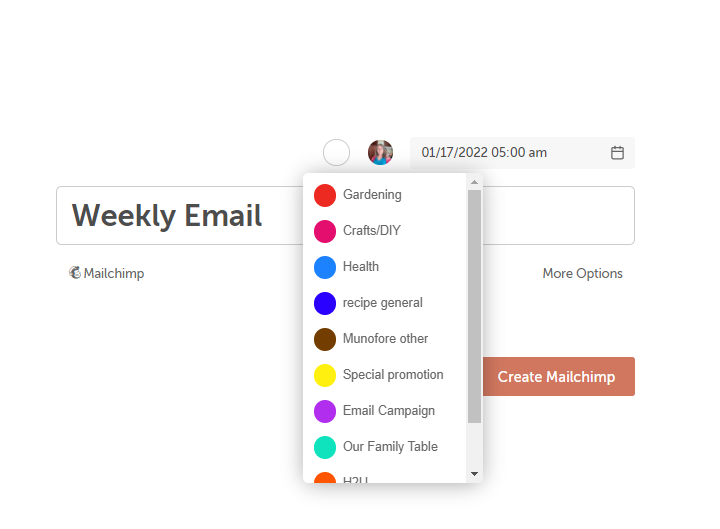
Create a Task
This is how you are going to add a to do item to your task list with a due date. On the left site type in something like "write weekly email" and then click on the word Schedule below it. Decide how far in advance you want your email written before sending. I do 3 days, but you do you.
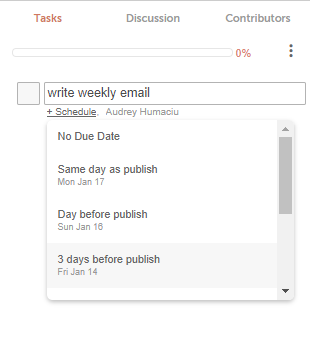
Duplicate the Task
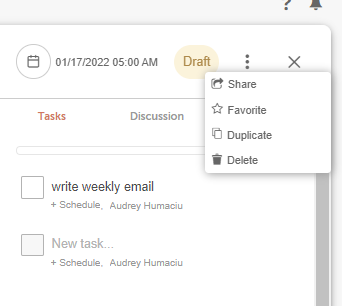
Once my task is filled in I make a duplicate it. Now, I have a master task that I can copy repeatedly and put on my calendar. The dates will change automatically as you move it around your calendar.
I do this before I enter an email title so I have a clean master copy. I have been known to send emails with the same title twice simply because I forgot to change it. If I leave it blank and forget Mailchimp will nag me.
Click on the three dots and a menu will appear, chose Duplicate. It will put it on the same date as the original with "(copy)" in front of it.
Make lots of copies and move them
I make about 8 copies then switch to calendar view. Then I drag them to the new date and remove the (copy) because it just irritates me. The task due dats will automatically change once you move the project.
Boom! two months of email projects and tasks on my calendar in a few minutes.
You can keep your original in Ideas, or just repeat the duplication process of the last task when you get to it.
Create your email
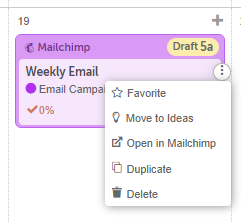
You can go directly to Mailchimp by clicking the three dots on the project in your calendar. (Click on the project first to make the dots appear.)
I prefer to test some email subject lines before I go to Mailchimp because CoSchedule's analyzer is much more detailed than the one in Mailchimp.
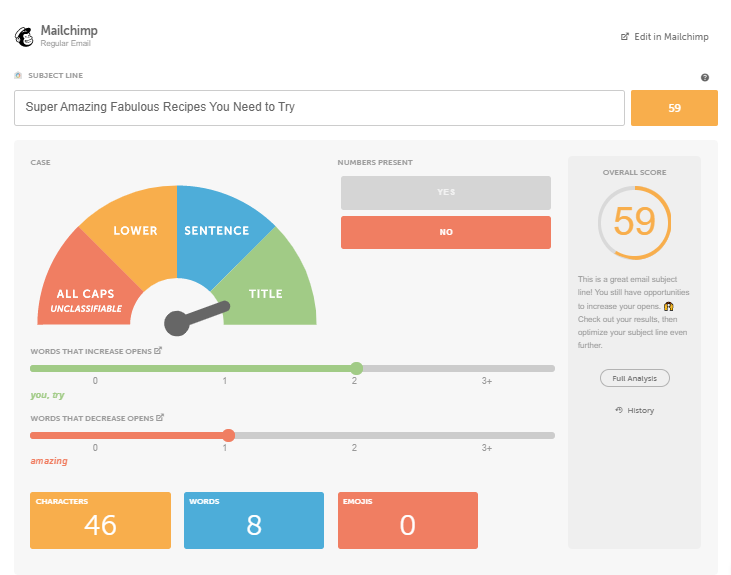
Play with the text until you get a good score and then click on Edit in Mailchimp to head over there and create your email.
Be sure to come back and mark your task as done in Coschedule because that 100% on a task looks so good.
Other CoSchedule Tips
I have posted before about how I use CoSchedule that may help you as you well:








Leave a Reply