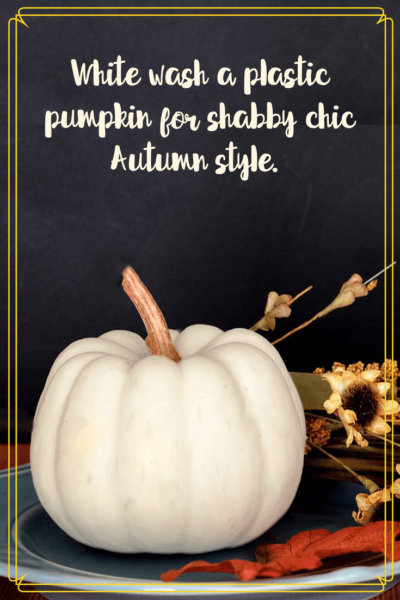
Use these tips and tricks to create some lovely white-wash pumpkins that will blend beautifully with a shabby chic or beach themed decor. They are also perfect for those tired garish orange plastic or foam pumpkins that have been sitting in your Halloween stash and need a face lift.
This post contains affiliate links. I may receive a commission at no cost to you for any purchases through these links, helping me to bring you more projects and recipes.
Supplies to white-wash pumpkins
pumpkins *
black acrylic paint
white chalk paint
paint brush
sponge brush
Mod Podge, optional
wooden stem or stick, optional
* You can do this with real, plastic or foam pumpkins. Keep an eye out at thrift stores and garage sales for artificial pumpkins that are still in pretty good shape but may have scratches.
White-wash pumpkins step 1: the base coat
To start with, it is recommended that you paint the pumpkin black. If you leave it orange, you are going to have to use many coats of white to cover the orange color, which then takes away from the stressed look you are going for. If you don’t mind solid white, that might be okay, but for a white-washed pumpkin that works with shabby chic décor styles, starting with a black pumpkin is best. Cover the pumpkin in black paint, then let it dry completely.
White-wash pumpkins step 2: layer on the white paint
White chalk paint will give this an old and worn look without even trying, but you could use white acrylic paint if you prefer. Either way, add the paint with a sponge brush, making sure the coats are a little uneven and do not completely cover the black pumpkin in white.
Silence your inner perfectionist for this project. You want it to look old and distressed, so don’t worry about having perfect painting strokes.
White-wash pumpkins for shabby chic Autumn style. Update old orange foam or plastic pumpkins and give them new life.White-wash pumpkins step 3: make it shine
This step is optional. Real pumpkins have a natural shine to them. White chalk paint does not. A simple coat of Mod Podge after the white paint is dry will do the trick. It will dry completely clear, and leave behind a smooth and shiny sheen on the pumpkin. It still has the shabby chic look, but has more of a natural pumpkin appearance as well.
White-wash pumpkins step 4: add a wood stem
Another optional step. You can paint the plastic stem if you wish, but to make it more realistic use a wooden stem purchased from a store or head out to the garden and find a nice stick the same thickness as the plastic stem. A little motivation to do some Autumn yard work, ha ha! Just cut out the plastic stem, then push the new stem into the top.
And there you have it, some lovely white-washed pumpkins to display around your home for a toned down Autumn look that will work throughout the season.
Other Autumn decorating ideas you may enjoy:













Leave a Reply