Compost is the organic gardener’s best friend. In fact, it’s hard to imagine a successful growing season without a healthy dose of this amazing, nutrient-rich “black gold” working its magic in your garden beds.
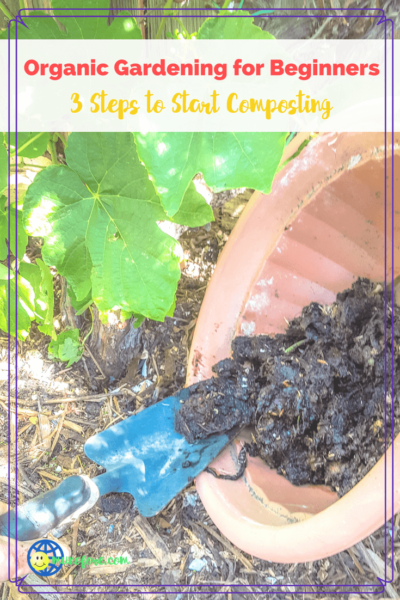
The best part is that you don’t need to spend a fortune to buy quality compost for your garden. You can make your own premium blend right in your own backyard with minimal to no investment. All you need is a little space, some basic raw materials, and a bit of effort to make it happen.
Step #1: Location, location, location
Although the recommended “ideal” dimensions for a compost heap ranges from 3 to 5 feet in length, width, and height, this isn’t a hard and fast rule. These dimensions are recommended because compost piles this size can generate enough internal heat to break down the organic matter inside quickly. At the same time, these dimensions are small enough that home gardeners can manually turn and keep them moist without too much trouble.
These conditions matter because heat, oxygen, and moisture all factor into how quickly the organic material in your pile breaks down. So, if you have space for a compost pile this size, that’s great! However, you don’t have to have this much space available to make your own compost. It just might take a little more time to do so.
You can either purchase a small composter for the task, or you can work organic kitchen scraps, shredded fall leaves, grass clippings, and other suitable materials straight into your garden beds for an added pop of nutrients as they break down naturally.
If this seems counterintuitive, consider this:
There are no compost piles in nature. They aren’t necessary because nature is extremely efficient when it comes to breaking down and reusing what is no longer viable on its own.
Step #2: Add the Right Materials (and in the Right Quantities)
Compost is created when organic material is broken down by microbes and other organisms in the presence of heat, moisture, and oxygen. There are two main categories of raw materials used to make compost:
- Brown (or carbon-rich) materials, such as fall leaves and wood chips.
- Green (nitrogen-rich) materials, which include grass clippings, coffee grounds, and other kitchen scraps.
There are plenty of opinions when it comes to what makes the “perfect” organic compost. And it can be confusing if you see a formula of 25-30 parts brown to 1 part green and then another that is 2 parts green to 1 part brown. Which is correct? BOTH!
Confused? I was at first, but let me clarify. The 30:1 brown to green is the chemical composition of the composting ingredients. Grass clippings have a ratio of 17 parts carbon to 1 part nitrogen, while pine needles are 80:1. So add up all of the ratios of your ingredients, carry the 3 and.... yeah, ain't no one got time for that.
The 2 green to 1 brown ratio is volume of raw ingredients. Add about two 5 gallons buckets of grass clippings to 1 bucket of brown leaves. Or there about.
Don't overthink it. Just give it a try and if it is not decomposing, you need more greens (and maybe a "starter"). If it is a stinky mess add some browns.
Remember, gardening is supposed to be fun, not another source of stress.
Avoid Adding the Wrong Materials
In addition to knowing what materials you should use, you’ll also want to avoid composting others. For example, dog and cat feces, sawdust from wood pallets or pressure treated lumber, glossy printed paper, non-organic kitchen scraps, grass clippings from areas that have been chemically treated, and meat and other animal products should be avoided. Some of these items will attract unwanted pests to your garden, while others will introduce toxic and harmful substances you’ll want keep far away from the food you grow.
Step #3: Air and Water Keep it Going
Besides browns and greens, your pile needs water and air. But not too much.
You want to keep the pile moist, but not soggy. We have had 6 years of drought and an incredible wet winter this year. I had to add water to my pile, especially in summer because it would dry out quickly and decomposition would stop. However, this year my pile was a sopping smelly mess that needed more dirt and browns to balance it out.
The pile also needs oxygen. The bottom of the pile will get warm from all of the activity at first and use up much of the oxygen. But spreading it out will slow the process because it will decrease the heat. "Turning" the pile by mixing the ingredients will keep the decomposition going.
Suggested Items to Get Started Composting
You can begin composting with no initial cost if you chose. Just pick a site in your yard that won't be disturbed by pets, or won't disturb you to look at. Ideally you want to keep it contained as well, but you can do that with scrap wood or even a 5 gallon bucket. Cut out the front part of a milk container to make a large scoop with a handle to collect kitchen scraps and you are ready to go.
When I started years ago, I bought this for kitchen scraps. I liked the filter in the top to control smells and it looked stylish on the counter.

For the actual composting I purchased the Envirocycle. Just put in the ingredients and give it a spin. It has survived at least 12 years in the hot Southern California sun and it is easy to roll around my yard to empty out. Plus I love the compost tea in the bottom for houseplants. And now it comes in hot pink!

Composting is easy to start and pretty hard to mess up hopelessly. Besides sending less trash to the landfill, it will be a healthy does of nutrients to your plants. Start small and see how you like it. You can always upgrade later.






Clearissa says
Very interesting. Great advice that would even work for folks like me with little space but visions of garden grandeur. 🙂