• Skip to primary navigation
  • Skip to main content
  • Skip to primary sidebar
Munofore
  • Crafts
  • Gardening
  • Self Care
  • Home
  • Humor
  • Blogging
  • Random Thoughts
menu icon
go to homepage
  • Crafts
  • Gardening
  • Self Care
  • Home
  • Humor
  • Blogging
  • Random Thoughts
  • follow the fun

    • Facebook
    • Instagram
    • Pinterest
    • Twitter
  • subscribe
    search icon
    Homepage link
    • Crafts
    • Gardening
    • Self Care
    • Home
    • Humor
    • Blogging
    • Random Thoughts
  • follow the fun

    • Facebook
    • Instagram
    • Pinterest
    • Twitter
  • ×

    That Recipe is a participant in the Amazon Services LLC. Associates Program. This site contains affiliate links to various websites, including Amazon.com. Purchases through these links help support this blog at no additional cost to you. read more

    Frugal Fix: Typing Table (a Tale of DIY Don't)

    Apr 25, 2016 · 5 Comments

    53 shares

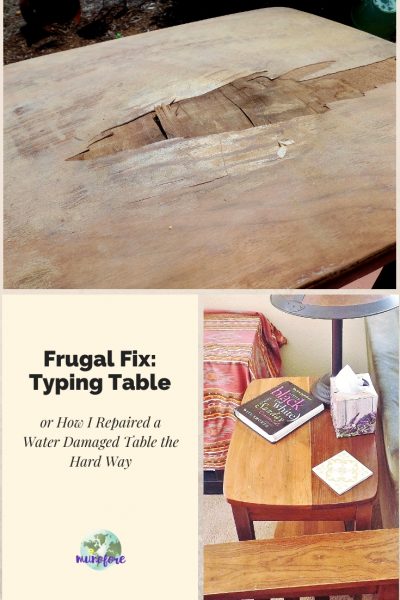
    Frugal Fix: Typing Table or How I Repaired a Water Damaged Table the Hard Way

    Frugal Fix Typing Table

    I have been getting a little restless with the decor in my home as I mentioned when I redid the pictures in the upstairs hallway. By the way, that project came out so good, my husband wants me to move those pictures to the living room and the family pictures upstairs. Or maybe he just doesn't like looking at our relatives...

    Anyway, this post is about the typing table. I inherited this from my grandparents, which is the only reason I knew what it was. There is a matching chair in another room.

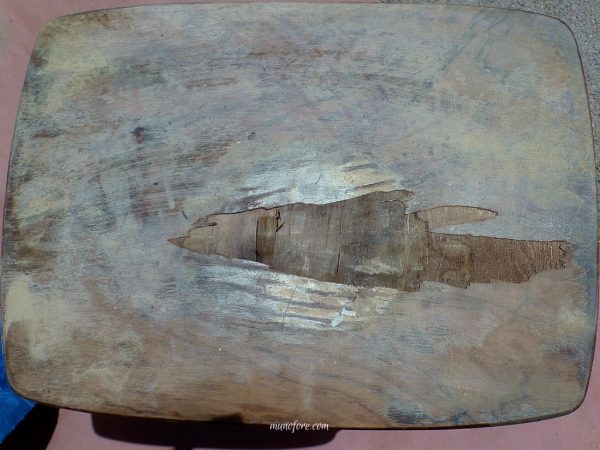
    About a dozen or more years ago, I had a tabletop fountain on the table that leaked and by the time I noticed had ruined this table. I couldn't just toss it because of the sentimental value. So, we've kept it covered so no one would see the damage. Of course the laminate top was still buckled making it precarious to place a drink on it without fear of it toppling.

    Frugal Fix(11)

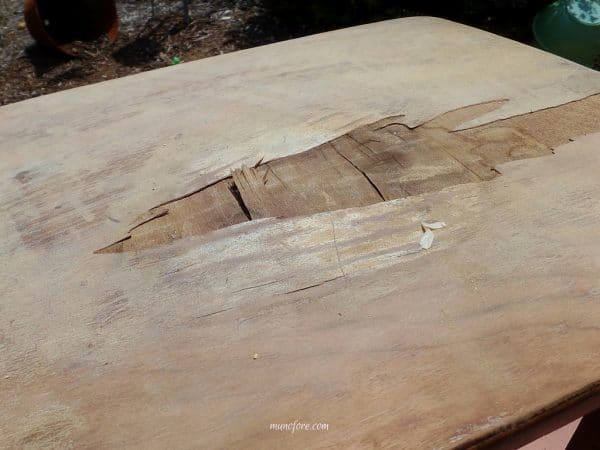
    I decided it was time to try to remove the damage and stain it, if possible. My back up plan was to cover it with tile or wood if the water damage was too bad or the wood underneath was ugly. But, I was really hoping the stain would work because it was cheaper and easier. I pried the easy part off with a screw driver.

    This is where the DIY fail comes in. Well, not really a fail because the end result was a win. Maybe a DIY Disaster? Probably a DIY don't. I am sure there is a better way to do this, but all I could come up with that I had in my house was a hammer and a flat head screw driver.

    Frugal Fix(5)

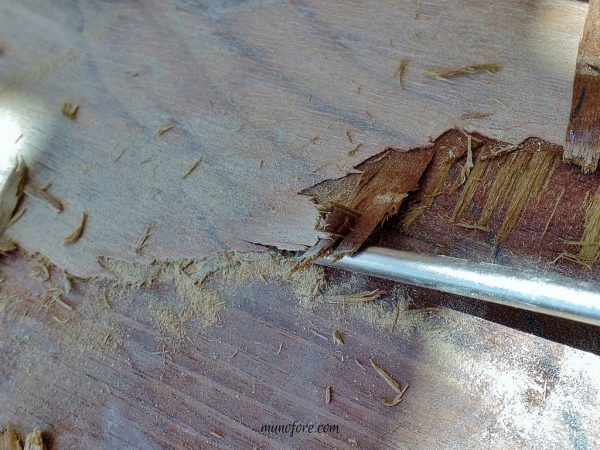
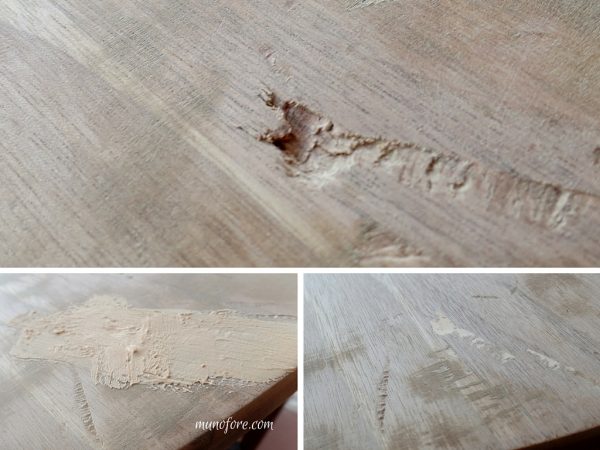
    For two hours I chiseled away and removed as much of the damaged layer as possible. If you want the specifics, I held the screw driver at about a 25-30 degree angle and tapped it with the hammer. Only missing and hitting my hand few times.

    Frugal Fix(4)

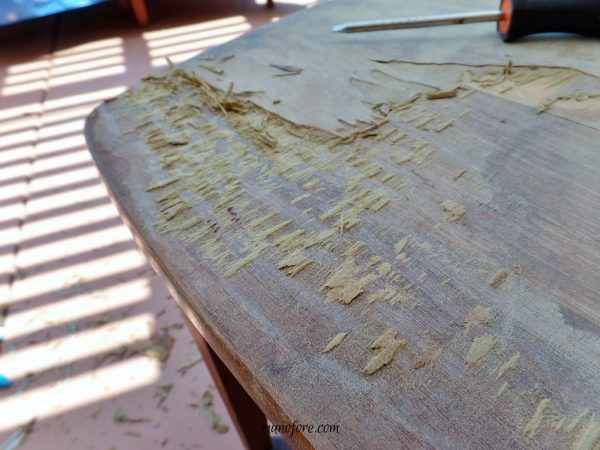
    I then sanded down the remnants for a nice smooth surface

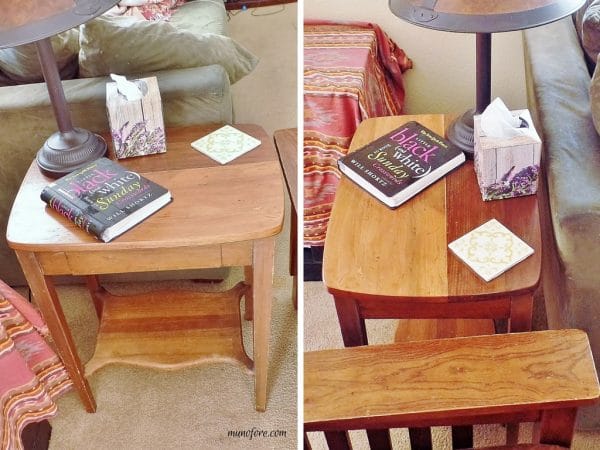
    For the most part the top was in good shape. I could live with the two different colors, as a matter of fact, I think it added character. What I didn't love was the gap between the boards and the big gouge I made when chipping off the top. I wanted the top to be as antiqued looking as the rest of the table, but that gouge was pretty deep. So, I filled in the spots with gobs of stainable wood filler and sanded it down once it was dry.

    Frugal Fix(7)Frugal Fix(6)

    Then I stained it. And it was beautiful. Frugal Fix: Typing Table - fixing a water damaged antique typing table the hard way. DIY Fail DIY Disaster DIY Don't

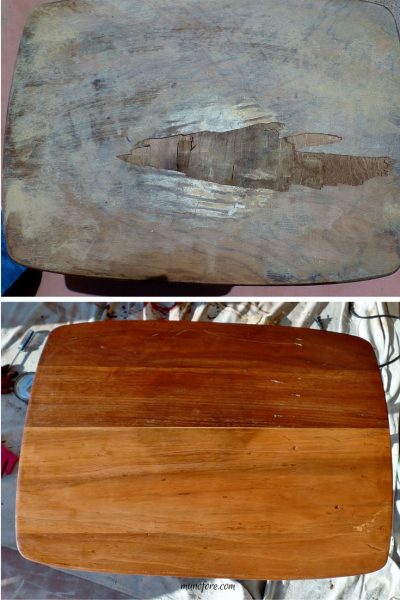
    A little too beautiful to match the rest of the well worn table. So I did something very painful to me after all of that hard work making it perfect: I scratched up that gorgeous smooth stained  surface with a screw driver and some sandpaper. Frugal Fix(2)Frugal Fix(3)

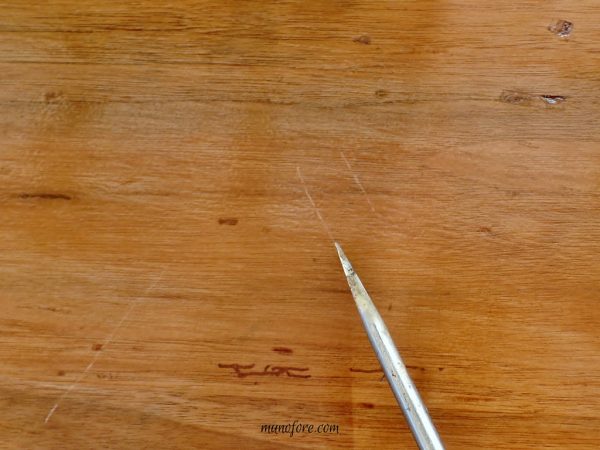
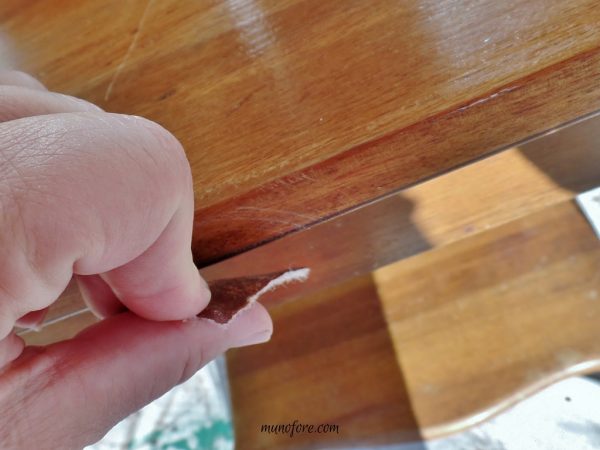
    And now it is back in place as an end table and can safely hold a drink... on the coaster of course.

    Frugal Fix(9)

    Next up in my remodeling efforts is the mystery behind the cloth sitting next to the table.

    collage of waterstained table repair

    « Lip Sync Memes and Friday Frivolity Linky Party
    Kids Craft - Strawberry Basket Craft for May »
    53 shares

    Reader Interactions

    Comments

    1. Sarah Eliza @ devastateboredom says

      April 27, 2016 at 2:40 pm

      Wow, gorgeous results! The two hours spent chipping away definitely sounds painful though...

      Can't wait to see the next mystery project!

      Reply
      • Audrey Humaciu says

        April 28, 2016 at 3:17 pm

        Luckily I only whacked my hand a few times, but they were sore the next day from the death grip I had on the hammer and screwdriver.

        Reply

    Leave a Reply Cancel reply

    Your email address will not be published. Required fields are marked *

    This site uses Akismet to reduce spam. Learn how your comment data is processed.

    Primary Sidebar

    audrey humaciu in kitchen

    Welcome

    I'm your hostess, Audrey, an avid "maker" that believes home made is better.

    Whether it's cooking, crafting, gardening, home décor, even blog design, I love making and growing things... even if I make a mess in the process.

    Discover more about me →

    Seasonal Projects

    • top down view of dried rose shadow box
      Make a Dried Rose Shadow Box Display to Preserve Memories
    • A Big Hug Card craft for kids
      A Big Hug Card Craft for Kids
    • supplies for red envelope making with text overlay "free printable Red Envelopes for Chinese New Year"
      Free Printable Red Envelopes for Chinese New Year
    • collage of video game themed Valentines with text overlay "25 free printable video game valentines"
      25 Free Printable Video Game Themed Valentines

    Popular Posts

    • elderly woman with family in the background and text "Sudden Dementia Could be Life Threatening."
      Sudden Dementia in the Elderly Can be Life Threatening
    • collage of pallet planters with text "DIY pallet planters: 2 ideas"
      DIY Pallet Planter: 2 Ideas
    • top down view of dried rose shadow box
      Make a Dried Rose Shadow Box Display to Preserve Memories
    • collage of plastic fruit containers with text overlay "Creative ways to upcycle plastic clamshell containers"
      Awesome Ways to Reuse Plastic Fruit Containers

    follow the fun

    • Bloglovin
    • Facebook
    • Instagram
    • Pinterest
    • Twitter

    Footer

    ↑ back to top

    About

    • About Munofore
    • Privacy Policy, Cookie Policy and Disclosure

    Newsletter

    • Sign Up! for emails and updates

    Contact

    • Contact
    • Work with Me

    As an Amazon Associate I earn from qualifying purchases.

    Copyright © 2023 Munofore

    • 41
    53 shares